
Download link for software:
http://www.xgecu.com/en/download.html
Click the download link for T48 and web_Local
Setup: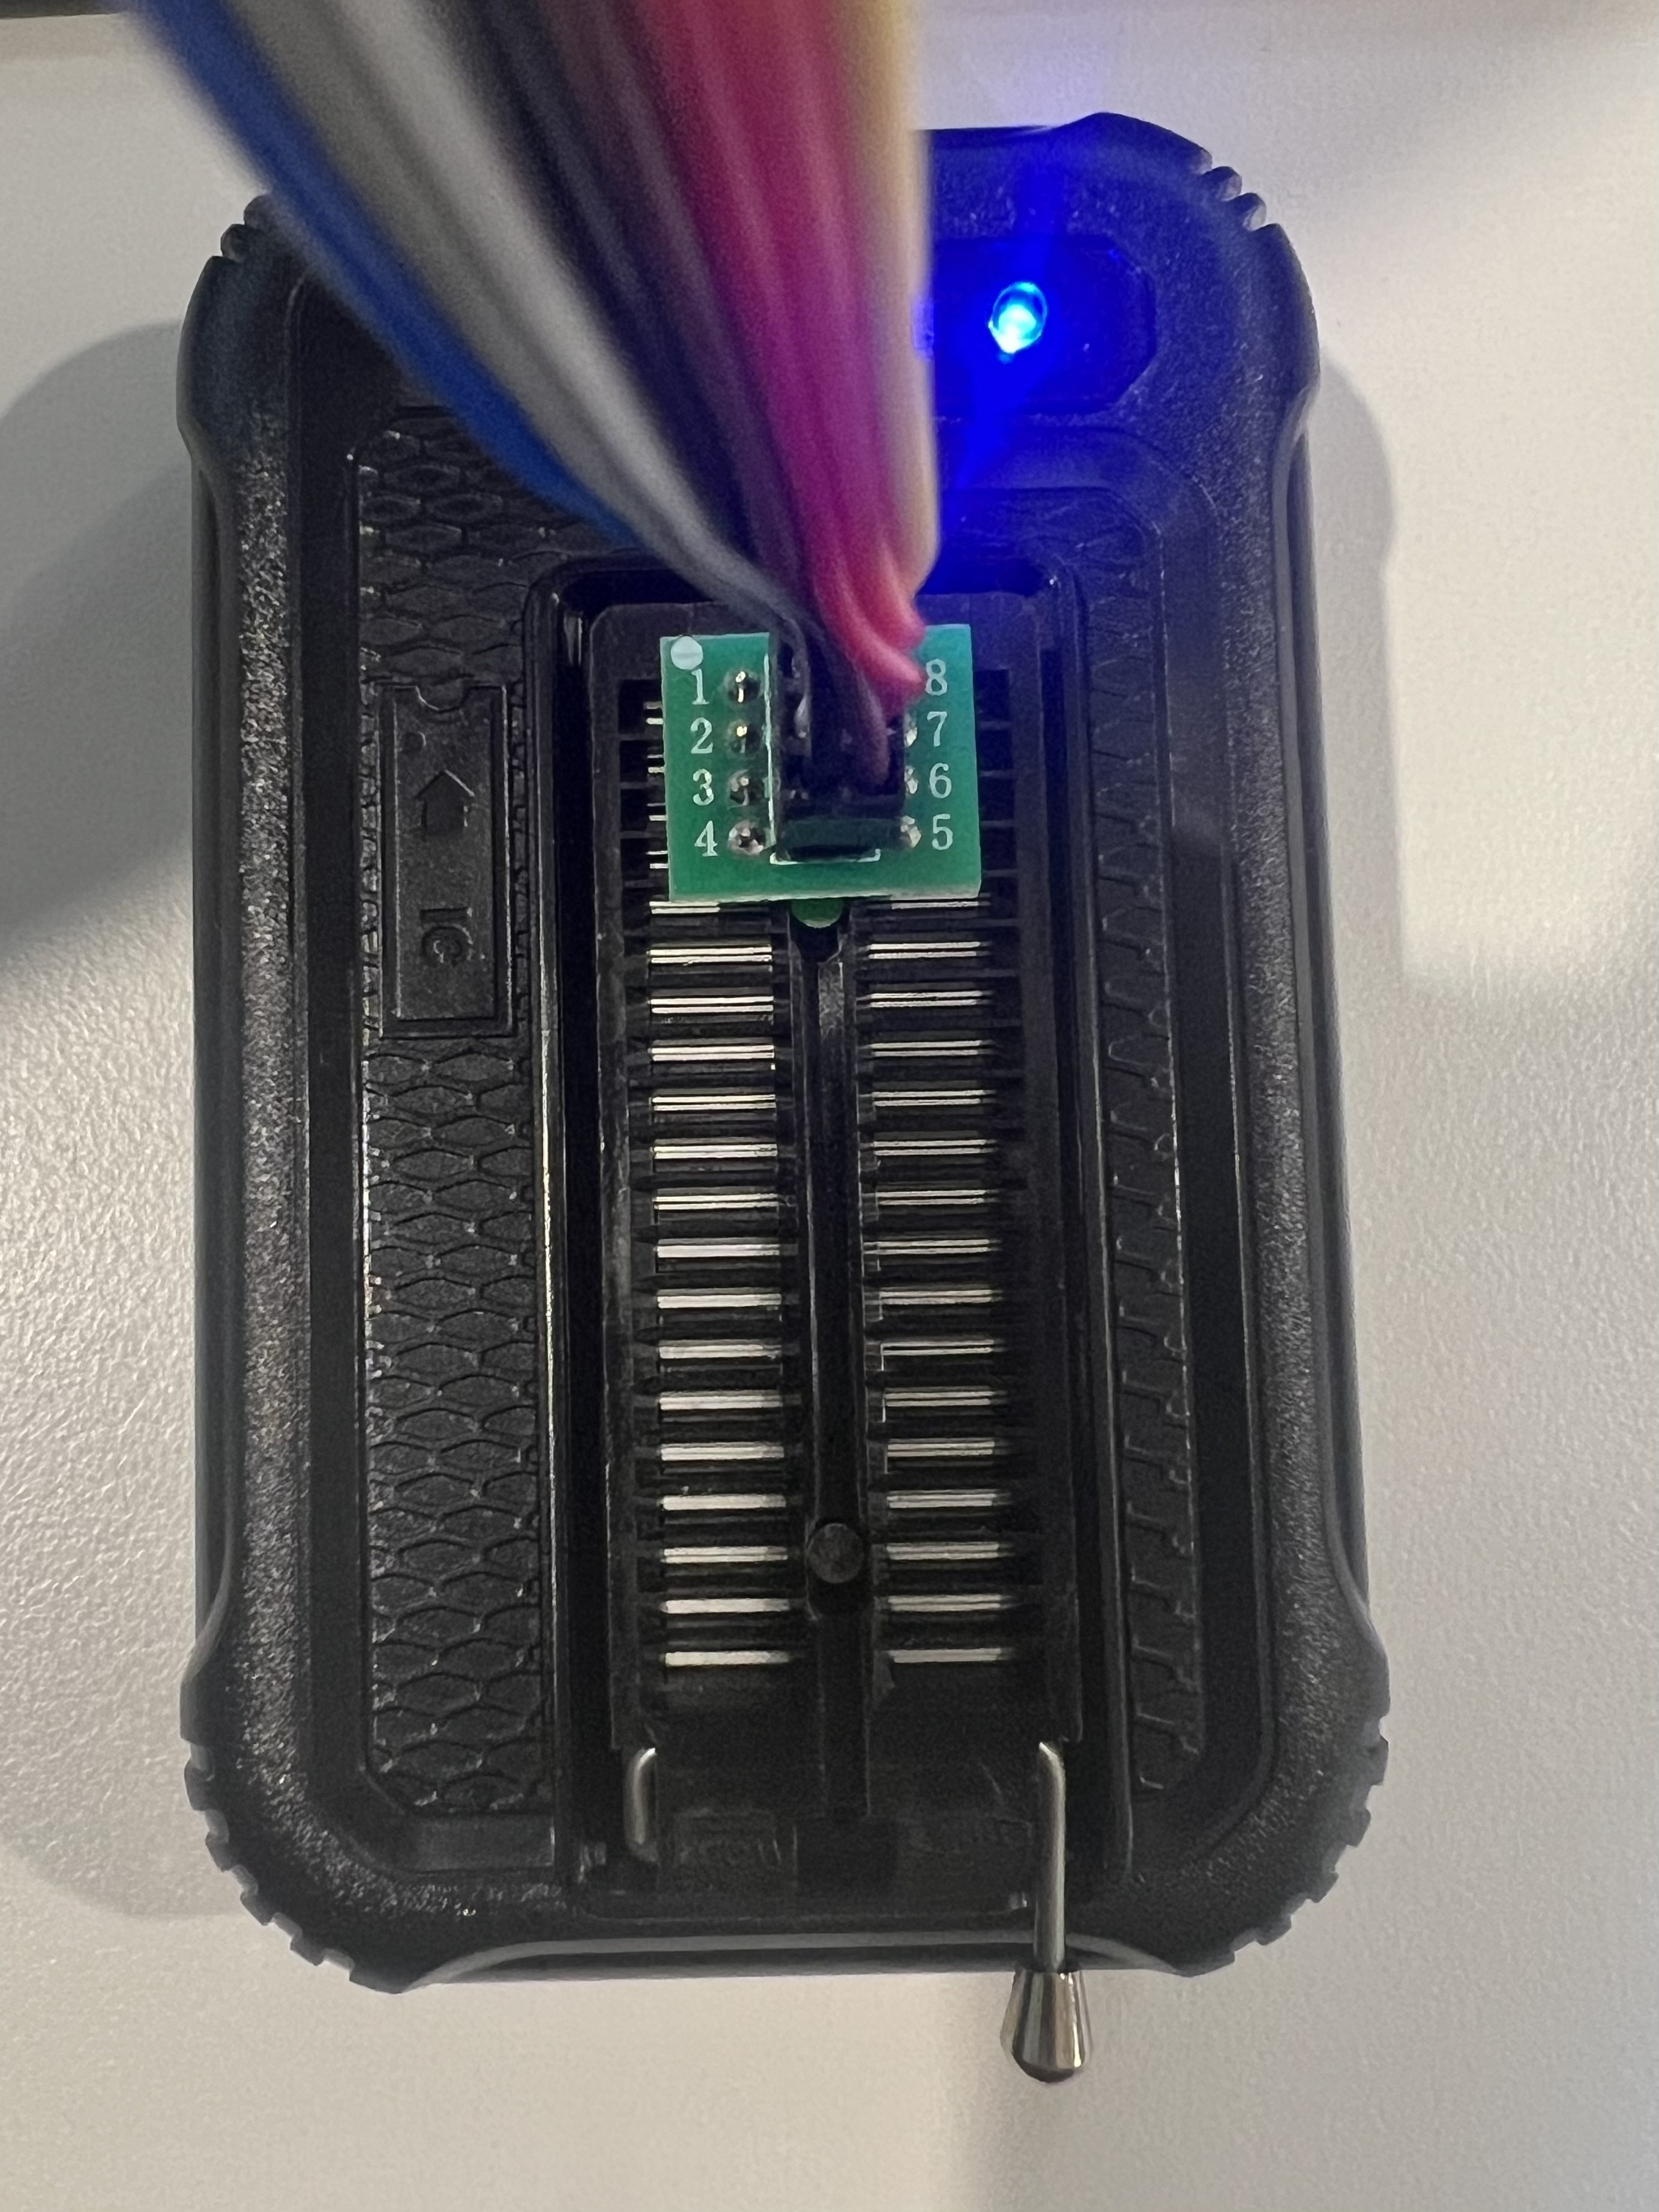
Make sure you have it plugged into the correct orientation.
TO DETECT: 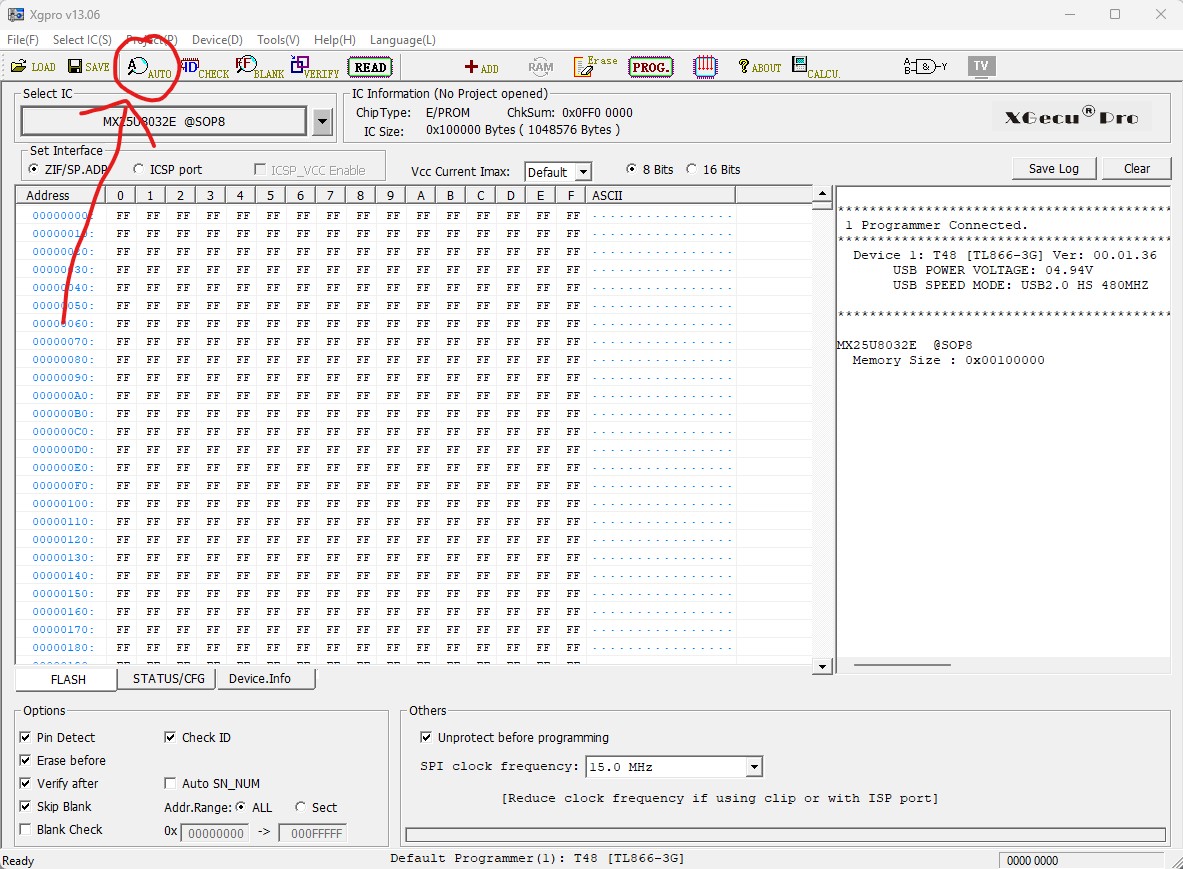
Hit the auto button to open up the auto detect menu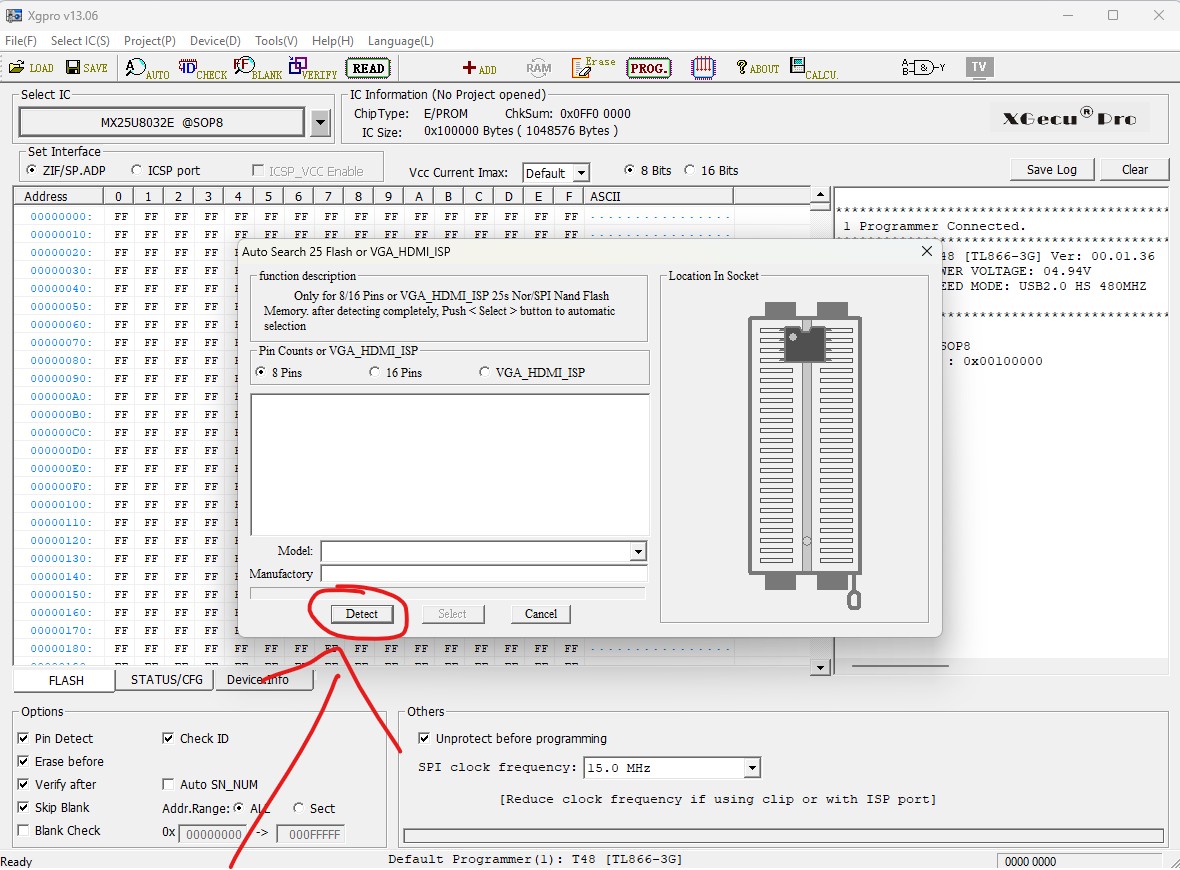
Connect the pins from reader to chip, and hit the detect button. 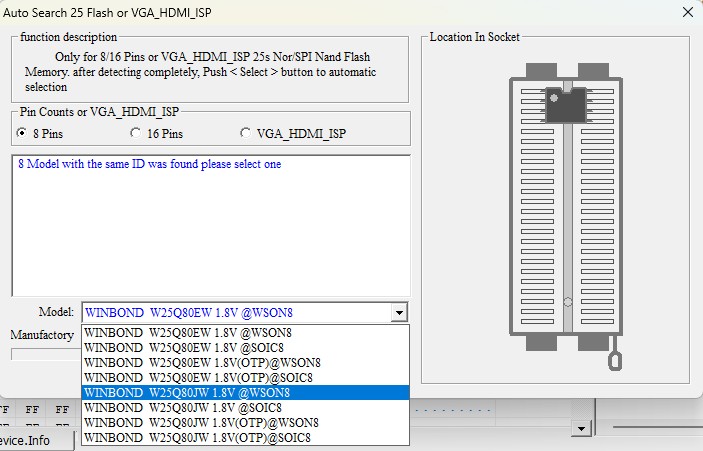
Then select your chip. If you don't get this screen it means it failed to autodetect. Usually means the pins are not making contact with the chip correctly. Try again.
TO READ: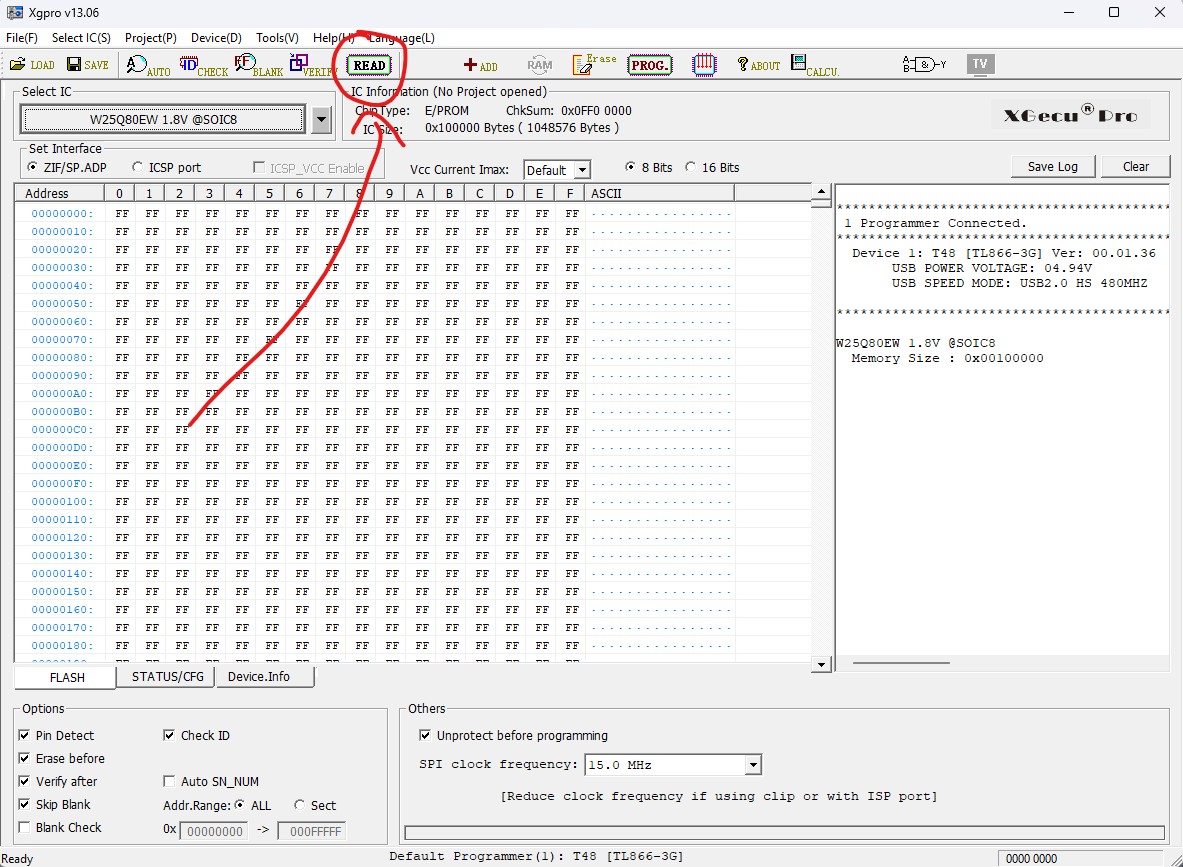
Click the read button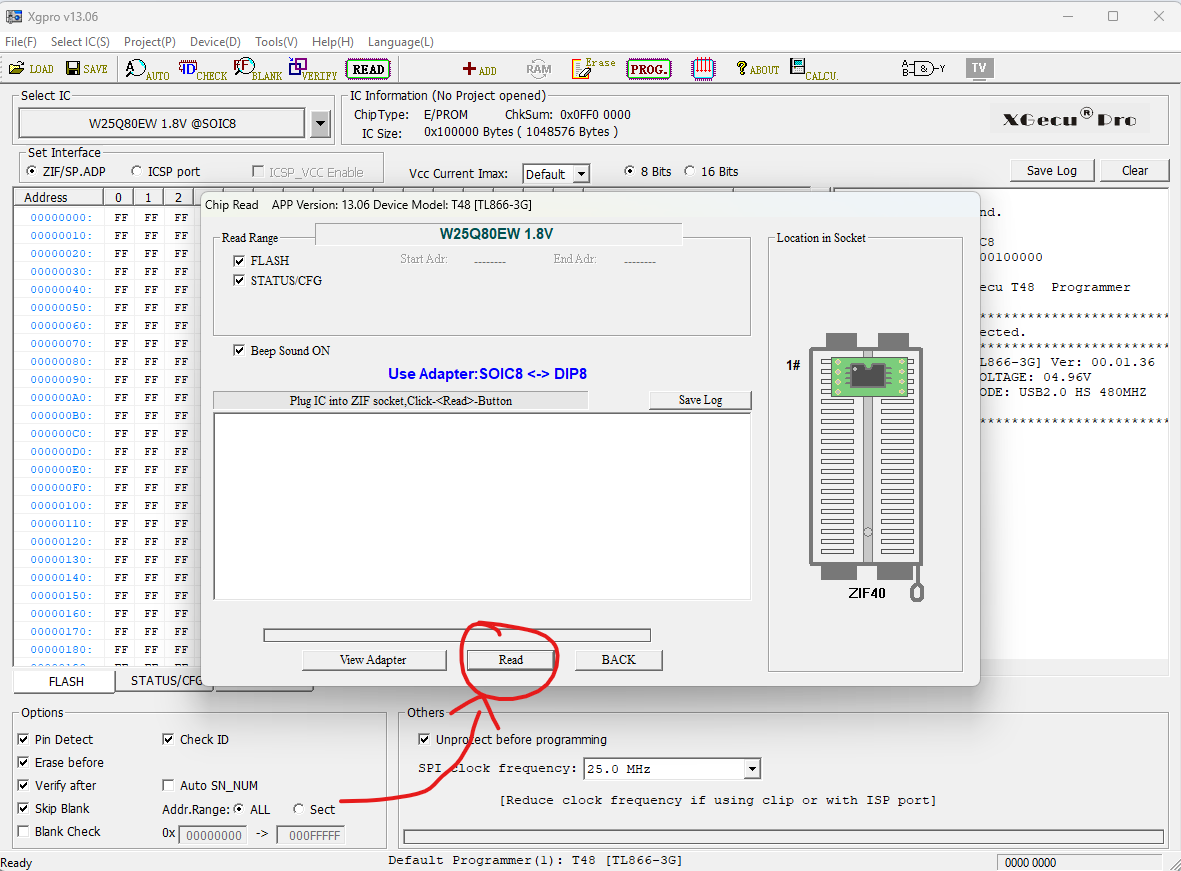
This menu will pop up. Then we want to make sure our pins are connect to the chip correctly. Once connected we want to press the read button.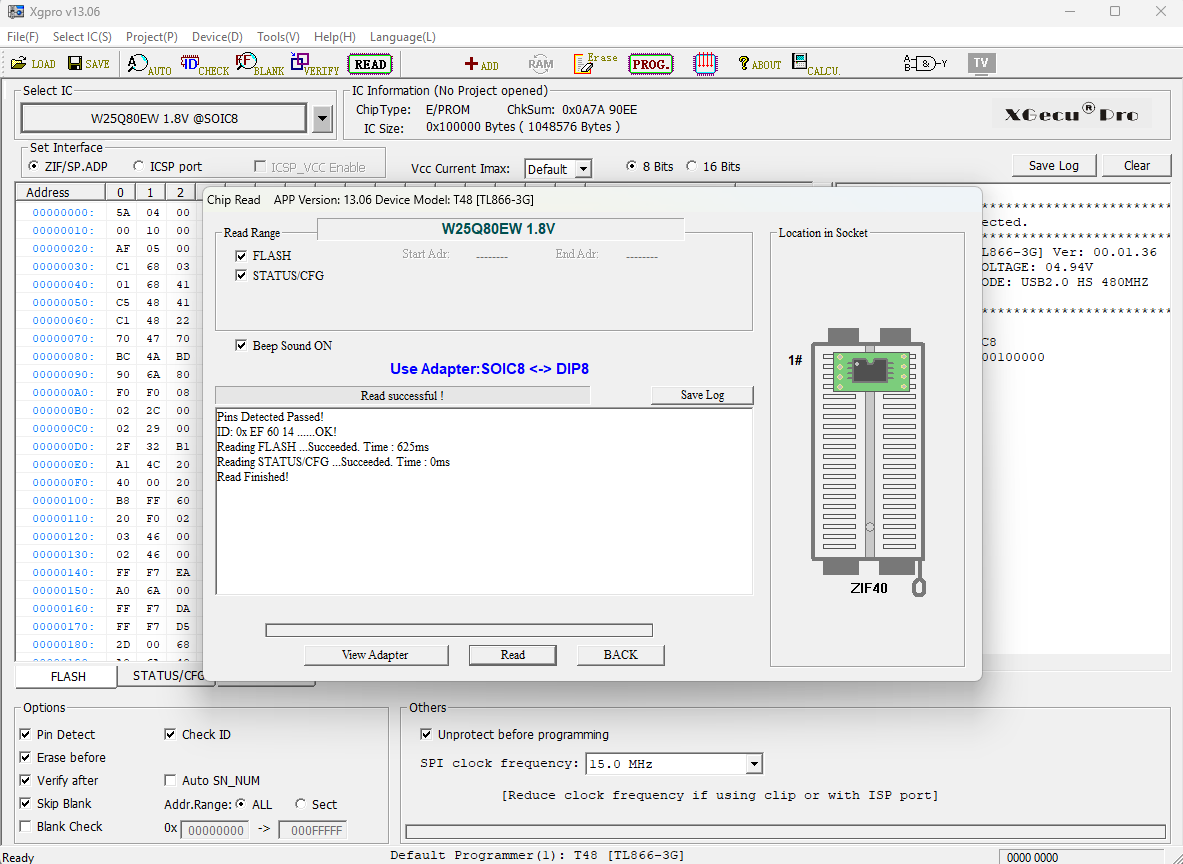
If we get this result it means the read is good and we can press the back button.
Please note that it means the reader thinks it's good. Do your due diligence and verify checksums to confirm the read is actually good. 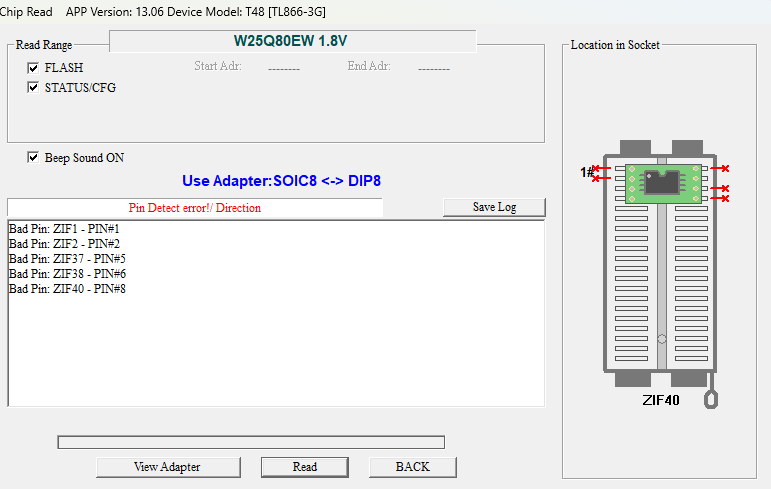
If we get this it means our read is bad! Try again with connecting the pins. The reader will show you which pins are bad.
TO SAVE: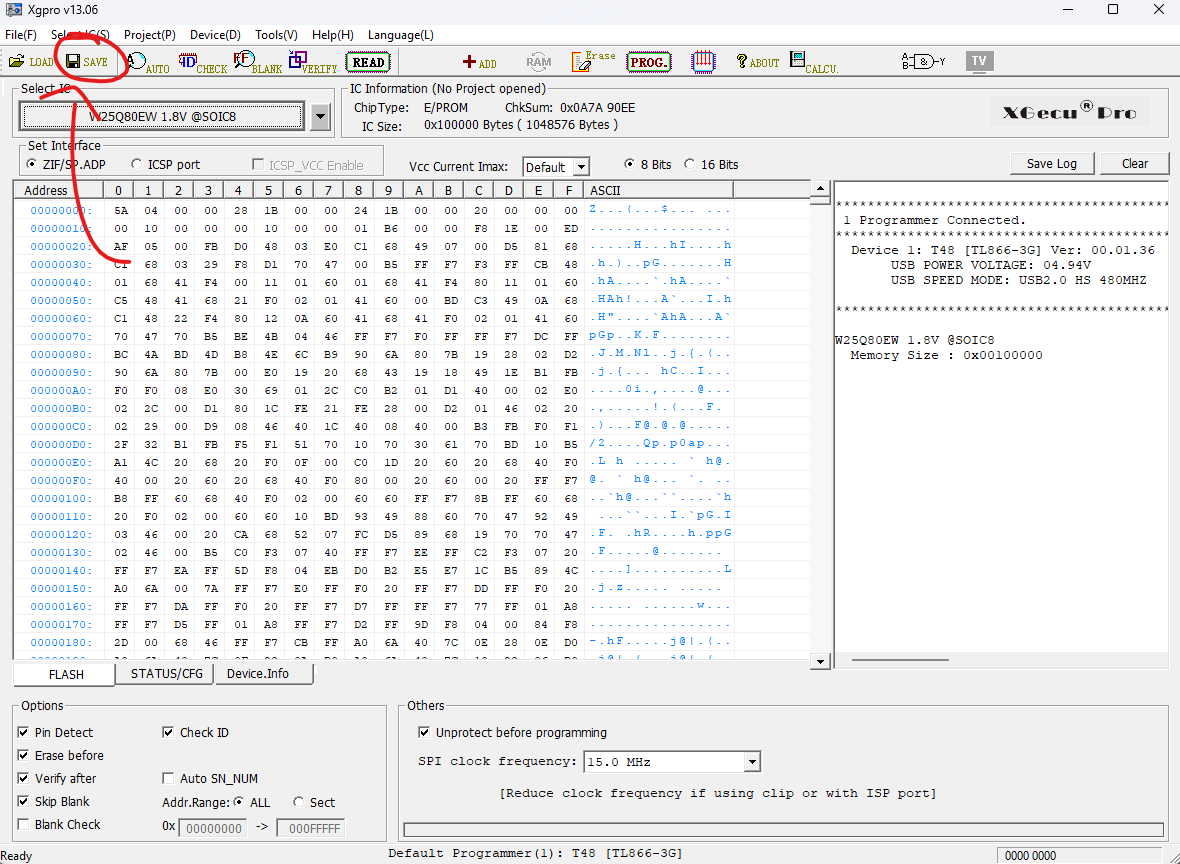
Extra Byte Warning
The software reads the chip's OTP region (e.g., an extra 0xC00 bytes) and appends it to the end of the dump by default.
How to prevent this in Xgpro
When saving a dump, under Select buffer, choose the FLASH radio button instead of DEFAULT. This ensures only the actual BIOS FLASH region is saved to the file with the exact standard size
Read Here